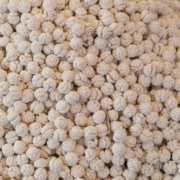
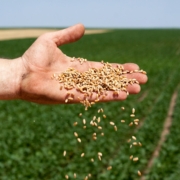
Chickpeas are an incredible crop choice for farmers working with limited water resources. Known for their ability to thrive in dry conditions, chickpeas bring both resilience and productivity to low-water environments. Their natural drought resistance allows them to grow and yield where other plants might fail.

The secret to their success lies in their deep root systems, which effectively tap into moisture far beneath the soil’s surface. This ability helps chickpeas withstand periods of low rainfall and still produce a viable harvest. Additionally, chickpeas are efficient in water usage, making them a reliable option when water conservation is essential.

For those keen on sustainable farming practices, incorporating chickpeas into agricultural plans enhances both environmental and economic outcomes. By choosing the right varieties and implementing smart planting techniques, farmers can achieve impressive yields while conserving precious water resources.

Benefits of Chickpeas in Low-Water Conditions

Chickpeas have proven to be a sturdy and resilient crop, particularly in low-water environments. Their ability to grow with minimal water makes them a valuable choice for farmers in drought-prone areas. This resilience is largely due to their deep-rooted system. Unlike some plants that rely on surface water, chickpea roots burrow deep into the soil. This allows them to access moisture stored well below the ground, giving them an advantage during dry spells.

Additionally, chickpeas are exceptional at conserving water themselves. They require less water than many other crops, which makes irrigation more efficient and sustainable. Their leaves have a waxy coating that helps reduce water loss through evaporation, ensuring that the plant retains moisture for longer periods.

Chickpeas also boast a natural drought resistance that comes from their unique physiology. They can slow their growth rate when water is scarce, conserving their energy and resources until conditions improve. This ability to withstand dry conditions without losing vitality makes them an ideal crop for regions with unpredictable weather patterns.

Overall, choosing chickpeas for low-water areas supports sustainable agricultural practices and boosts productivity even in challenging climates. Their efficient water usage and deep-rooted advantage help farmers make the most of limited resources.

Selecting the Right Chickpea Seed Varieties

When farming in dry conditions, picking the right chickpea seed variety is crucial. Different varieties have different strengths, and selecting one with proven drought tolerance can make all the difference. Choosing seeds that are well-suited to withstand low-water environments ensures that your crop has the best chance of thriving.

Several chickpea varieties are well-regarded for their performance in dry climates. Kabuli and Desi are two commonly known varieties, each offering advantages. Kabuli chickpeas typically have larger seeds and are often preferred for their creamier texture. Desi chickpeas, meanwhile, are smaller but have a robust nature, making them particularly reliable under tough conditions.

Here are some recommended drought-tolerant chickpea varieties:

1. Cicer Arietinum: Known for its adaptability to dry climates, this variety offers strong drought resistance and reliable yield.

2. Sona: This variety is bred specifically for low-water conditions and is recognised for both its hardiness and productivity.

3. Shakti: Preferred in regions with limited rainfall, Shakti provides consistency and quality in less-than-ideal weather.

Selecting the right variety is a strategic choice that influences both yield and resource usage. By investing in drought-resistant seeds, you not only support sustainable farming but also position yourself for success even when water resources are scarce.

Planting and Care Tips for Dry Climates

Successfully growing chickpeas in dry climates requires thoughtful planting and care strategies. Start by selecting the right planting time. Chickpeas generally do best when sown early, allowing plants to establish before the hottest periods. This schedule takes advantage of any available moisture early in the season.

Preparing the soil is crucial. Well-drained soil is essential for chickpeas. Compacted or waterlogged soil affects root growth and plant health. Consider loosening the soil and incorporating organic matter, like compost, to enhance soil structure and moisture retention.

Water management is equally important. Aim for deep and infrequent watering which encourages the roots to grow deeper, seeking out moisture closer to plant roots. Use drip irrigation if possible, as it is an efficient way to deliver water directly to the base of the plant, reducing evaporation.

Mulching is another effective technique to conserve moisture. Apply a layer of organic mulch around the base of the plants to reduce evaporation and keep the soil cool. This practice also helps suppress weeds that compete for water and nutrients.

By following these planting and care tips, you’ll ensure that your chickpea crop grows optimally, even with limited water availability.

Maximising Yield: Managing Nutrients and Pests

To get the best yield from chickpeas in low-water conditions, careful management of nutrients and pests is vital. Chickpeas require specific nutrients to thrive, even when water is scarce. Nitrogen is essential, and since chickpeas are legumes, they have the ability to fix atmospheric nitrogen. Encourage this natural process by ensuring there are adequate soil bacteria to facilitate it. A soil test can determine if additional phosphorus or potassium is needed to support plant health.

When it comes to pest management, preventative measures are key. Chickpea crops can attract pests like aphids and cutworms, which can be problematic in dry conditions. Implementing integrated pest management (IPM) strategies is a smart way to minimise water dependency. Use natural predators like ladybugs to control aphid populations. Consider using row covers to physically protect young plants from pests.

It’s important to monitor regularly for signs of disease or infestation. Early detection allows for targeted treatments that conserve water and reduce reliance on chemical pesticides.

Conserving water while maintaining optimal nutrient levels and pest control will help you achieve a successful chickpea harvest in challenging conditions.

Conclusion

Growing chickpeas in low-water environments can be a sustainable and productive choice for farmers looking to maximise yield while conserving resources. Their natural resilience and ability to thrive with limited water make them ideal for dry climates. With careful selection of seed varieties, smart planting practices, and efficient water management, you can enhance the success of your chickpea crop.

As you seek to optimise your agricultural practices, consider the benefits that chickpeas bring to sustainable farming. By focusing on this resilient crop, you contribute to resource conservation and food security.

For farmers ready to tackle low-water conditions with a dependable crop like chickpeas in Australia, Shepherd Grain offers a wide range of high-quality seed varieties. Explore our website or get in touch to learn more about how our seeds can transform your farming strategy and help you make the most of your growing season.

Knowing how to check seed quality at home is a handy skill for any farmer or gardener. Good seed quality is crucial because it directly affects the germination rate and, ultimately, the success of your crops. Seeds that don’t germinate properly can lead to wasted effort and poor harvest outcomes.

Testing your seeds before planting can save lots of time and resources. It helps you identify which seeds are strong and healthy enough to grow into thriving plants. With just a few everyday items, you can conduct several simple tests at home to check seed quality.

These home tests are quick and easy, giving you a good indication of how healthy and viable your seeds are. By understanding and applying these techniques, you can ensure better crop yields and a more fruitful growing season. Checking your seeds before planting gives you the confidence that you’re off to the best start possible.

Importance of Seed Quality

Ensuring high seed quality is crucial for successful crop growth. Quality seeds are the foundation of any healthy and productive agricultural endeavour. They play a significant role in determining the germination rate. This directly impacts how many plants will grow from the seeds you plant. High-quality seeds have a better chance of germinating, which means a denser and healthier crop coverage.

Poor seed quality can negatively affect germination rates. When seeds lack the necessary vigour, they are less likely to sprout or may produce weak seedlings. This can lead to reduced plant density in the field, resulting in lowered crop yields. By planting seeds of poor quality, you risk wasting time and resources on a crop that won’t reach its full potential. Furthermore, seeds infected with diseases or pests can spread these problems to a healthy crop, compounding damage across an entire field.

Overall, choosing high-quality seeds ensures better resistance to diseases and environmental stresses. This reduces the likelihood of needing additional inputs like pesticides or fertilisers, saving costs in the long run. Investing in good seeds initially paves the way for a bountiful harvest later.

Germination Test at Home

Conducting a germination test at home is a straightforward way to check seed viability before planting. This test helps you determine the percentage of seeds that are likely to sprout, giving you an early indication of what to expect from your batch.

Follow these steps for a simple germination test:

  1. Count out a sample of seeds, aiming for at least 50 to ensure accurate results.
  2. Dampen a paper towel and lay it flat on a tray or plate.
  3. Place the seeds evenly on the towel, leaving space between each one.
  4. Cover the seeds with another damp paper towel to keep moisture levels consistent.
  5. Place the tray or plate in a warm area, away from direct sunlight, to simulate optimal growing conditions.
  6. Check daily and keep the towels damp but not soaked.

After about a week, you’ll see which seeds have sprouted. Count the number of sprouted seeds and calculate the germination rate by dividing the number of sprouted seeds by the total number of seeds tested and multiplying by 100. This percentage tells you how many seeds in a batch are viable.

A high germination rate indicates good seed quality, while a low rate suggests it might be time to find a new source of seeds. Keeping records of your tests helps you compare different seed batches over time, aiding in more informed planting decisions.

Visual Inspection Techniques

A visual inspection is a simple yet effective way to check seed quality before planting. It allows you to quickly identify visible signs of damage or disease that might affect germination and growth. Start by spreading your seeds out on a flat surface in good light. This makes it easier to spot any irregularities.

Here’s a checklist of common indicators to look for during your inspection:

1. Colour: Healthy seeds usually have a consistent colour; any discolouration could indicate a problem.

2. Size: Look for seeds that are uniform in size. Significant variations may suggest incomplete development or damage.

3. Shape: Seeds should have their characteristic shape. Misshaped seeds can be a sign of poor growth potential.

4. Surface Damage: Check for scratches, cracks, or holes, as these can be entry points for disease.

5. Mould or Fungal Growth: Be wary of any visible growth on the surface, as this is a clear sign of contamination.

Conducting a thorough visual inspection helps you weed out low-quality seeds before planting, increasing the chances of a healthy and high-yield crop.

Float Test for Seed Viability

The float test is a quick and easy method to evaluate seed viability. This test is based on the principle that viable seeds are generally denser and sink in water, while seeds that are less viable or damaged may float.

To perform a float test, follow these steps:

  1. Fill a bowl or container with room-temperature water.
  2. Gently place a sample of seeds into the water.
  3. Allow the seeds to sit for about 15 minutes.
  4. Observe which seeds sink and which float.

Once you’ve completed the test, remove any floating seeds, as they are often less viable. However, it’s important to note the limitations of the float test. While it’s useful for quickly checking seed quality, it isn’t infallible. Some viable seeds may float due to air pockets or surface coating. Therefore, the float test should be used as one part of a broader seed quality assessment.

Conclusion

Understanding and ensuring seed quality is fundamental to achieving successful crop production. By conducting simple tests like germination, visual inspection, and float tests, you can greatly enhance the chances of achieving a robust and high-yielding crop. Each method provides valuable insights, helping you make informed decisions before planting. This proactive approach ensures that you are planting seeds that are healthy, viable, and primed for strong growth.

For top-quality seeds that meet these rigorous standards, consider contacting Shepherd Grain. Our grain company offers a wide range of premium seed varieties specifically chosen for their high germination rates, vigour, and adaptability. Trust us to provide you with the foundation for a thriving crop, backed by our expertise and commitment to excellence.

Mung beans are a popular choice for farmers seeking a versatile and nutritious crop. Understanding the development of mung bean seedlings is key to achieving a healthy and bountiful harvest. These little green gems go through several stages from germination to full growth, each crucial for their proper development.

The journey begins with the process of germination where the seeds sprout into life, followed by a series of stages that define their growth into strong and productive plants. Each stage requires attention to specific conditions and care to ensure optimal growth.

Knowing what influences mung bean seedling growth can help you create the best environment for them. From temperature and moisture to soil quality and seed choice, each factor plays a significant role in their development. By tackling common challenges and applying best practices, you can cultivate mung bean seedlings that thrive, leading to a successful agricultural venture.

Stages of Mung Bean Seedling Development

Mung bean seedlings undergo several key stages from the moment they germinate until their first true leaves appear. Understanding these stages helps you provide the right care at each step.

The process begins with germination, where conditions like moisture and warmth trigger the seeds to sprout. In about 2 to 5 days, the radicle, or the first root, pushes through the seed coat and starts anchoring the plant into the soil. Shortly after, the plumule, or the young shoot, emerges and grows upward.

Following germination, the seedling enters the cotyledon stage, which lasts about 7 to 10 days. Here, the seed leaves, or cotyledons, appear and start the photosynthesis process, providing energy for the young plant. During this stage, the seedling focuses on developing roots and shoots to support further growth.

Next comes the true leaf stage, occurring around 10 to 14 days after sprouting, where the first set of true leaves grows. Unlike the thicker seed leaves, these true leaves are more delicate and entirely visible above the soil. The development of these leaves marks a crucial period, as they enhance the photosynthesis process and contribute significantly to the seedling’s growth.

Factors Affecting Seedling Growth

Several environmental factors play a pivotal role in the development of mung bean seedlings. Controlling these variables can result in more vigorous growth and better crop outcomes.

Temperature is one of the most critical elements. Mung bean seedlings thrive in warm conditions, with an ideal temperature range between 25°C to 30°C. Consistently high or low temperatures can significantly impair growth or even halt the germination process altogether.

Moisture is equally important. Too much water can lead to waterlogged soil, suffocating the roots, while insufficient moisture will cause seeds to dry out and fail to germinate. Maintaining consistent watering is essential for optimal growth.

Light is another vital factor. Mung bean seedlings grow best in full sunlight, which ensures they receive enough energy for photosynthesis during the early stages. In shaded conditions, the seedlings might become weak and elongated as they stretch towards available light.

Soil quality and seed variety also impact seedling development. Good quality soil that is well-drained and rich in nutrients provides a favourable environment for growth. Diverse seed varieties might exhibit different growth rates and disease resistance, so selecting seeds suited to local conditions can enhance results.

Common Challenges in Mung Bean Seedling Cultivation

Growing mung bean seedlings can be rewarding, but it’s not without challenges. Understanding these common issues helps you take timely action to safeguard your crops. Pests like aphids and beetles are persistent threats, feeding on tender seedlings and potentially spreading diseases. Regular inspection is key; introducing natural predators like ladybugs or using gentle insecticides can help manage these pest populations.

Diseases such as root rot and fungal infections can also hamper growth. Ensure good soil drainage and avoid overwatering to reduce the risk of fungal issues. Using disease-resistant seed varieties can offer an additional layer of protection. Additionally, monitor for signs of nutrient deficiencies, such as yellowing leaves, which often indicate inadequate nitrogen or other essential nutrients. Conduct soil tests and apply the appropriate fertilisers to replenish deficient nutrients.

Preventive measures like crop rotation can minimise the impact of recurring diseases and pests. It’s important to adopt integrated pest management strategies, blending cultural, mechanical, and biological tactics to create a sustainable growing environment.

Best Practices for Healthy Seedling Development

Growing robust mung bean seedlings requires a combination of effective practices that focus on optimal conditions. Start with proper soil preparation, ensuring it is loose and well-aerated to encourage root growth. Use nutrient-rich soil or amend with organic matter to provide essential nourishment.

Watering is critical, but balance is key. Mung beans require consistent moisture but dislike soggy conditions. Water the seedlings regularly, keeping the soil moist without waterlogging. In terms of spacing, give each seedling about 10-15cm apart to avoid overcrowding and promote healthy airflow.

Light is another vital factor. Ensure seedlings receive plenty of sunlight, ideally around 6-8 hours a day. If growing indoors or in shaded areas, consider using grow lights to supplement natural light. Regularly check the seedlings for any signs of stress or disease. Early detection enables you to act swiftly, using safe treatments to address the issues.

Monitoring growth progress and making timely interventions when needed helps maintain the health of your seedlings. Keeping a gardening journal to note observations and actions taken can be valuable for future cultivation efforts.

Conclusion

Ensuring the healthy development of mung bean seedlings is an achievable task with diligent care and attention. By understanding common challenges and implementing best practices, you set the stage for a thriving garden or crop field. As you focus on each stage, from selecting quality seeds to monitoring growth, you’ll see the benefits of your efforts reflected in a successful harvest.

Experience the joy of nurturing a prosperous mung bean crop with support from Shepherd Grain, your partner in quality seed solutions. Our extensive range of mung bean seed varieties, coupled with our expertise, offers the foundation you need for robust growth. Explore our website to explore our offerings and start your journey towards a successful harvest.

Faba beans are a valuable addition to any farm’s crop strategy. Known for their ability to fix nitrogen in the soil, these plants enhance the soil’s fertility, benefiting subsequent crops. Nitrogen is a key nutrient for plant growth, and faba beans have a unique way of supplying it directly from the atmosphere with the help of bacteria living in their roots.

Selecting the right seed varieties plays a big role in maximising this benefit. With the right faba beans, farmers can effectively boost soil health and therefore increase crop yields. Understanding the characteristics that make certain varieties better for nitrogen fixation is essential for achieving the best results.

Besides choosing the right seeds, proper planting and growing techniques are crucial. Integrating faba beans into crop rotations can further improve soil structure and fertility, contributing to a more sustainable and productive farming practice. By incorporating faba beans into your rotations, you’ll be giving your soil the boost it needs for healthy future harvests.

Understanding Nitrogen Fixation in Faba Beans

Faba beans are often hailed as nature’s little soil builders. This is because of their impressive ability to fix nitrogen directly from the air into the soil, a process that happens right beneath our feet. This remarkable characteristic is made possible through a symbiotic relationship between the faba bean plants and a particular type of bacteria, Rhizobium, that resides in their root nodules. As the plant grows, these bacteria convert atmospheric nitrogen, which plants can’t use in its gaseous form, into a usable form that plants can absorb and utilise.

The benefits of this natural process extend far beyond just the faba beans themselves. As nitrogen is a crucial nutrient that aids in plant growth, faba beans help enhance soil fertility, reducing the need for synthetic nitrogen fertilisers. This not only cuts down costs for farmers but also supports environmental sustainability by lessening chemical run-off into nearby lands and waterways. The enhanced soil remains rich in nutrients, providing a strong foundation for the next crops planted in succession. This results in better growth and higher yields for other crops, making faba beans an essential part of any effective crop management strategy.

Choosing the Right Faba Bean Varieties

When it comes to growing faba beans for nitrogen fixation, selecting the right seed variety is crucial. Different varieties come with their own set of strengths, and choosing the one that best suits your soil and climate conditions ensures you maximise nitrogen benefits. A robust faba bean variety should be resilient to local pests and diseases, exhibit strong germination rates, and have high vigour.

When evaluating seed quality, pay close attention to a few factors. Start with the germination rate, which indicates how many seeds are likely to sprout under ideal conditions. A higher germination rate suggests that you’ll get more plants from the seeds you plant, increasing your chances of a healthy crop. Vigour is another important trait. It refers to the strength and rapidity of seedlings’ growth, which helps plants establish quickly in the soil and utilise nitrogen efficiently.

Selecting seeds that are best suited to specific regional conditions can also significantly enhance outcomes. Some varieties are specially bred to thrive in particular climates or resist specific pests, improving their performance in certain areas. Farmers can seek advice from local agricultural experts or seed suppliers to choose the most appropriate variety for their needs. This thoughtful selection process lays the groundwork for a productive and sustainable farming season, leveraging faba beans’ unique nitrogen-fixing abilities to enhance crop production.

Planting and Growing Techniques for Optimal Results

To ensure faba beans perform their best as nitrogen fixers, you need to start with the right planting and growing techniques. Begin by preparing the soil well before planting. This means tilling the soil to break up any large clumps and removing any weeds or debris that might compete with your plants for nutrients. A well-drained soil is crucial since faba beans do not thrive in waterlogged conditions.

When it comes to spacing, make sure to plant the seeds at a suitable distance—typically around 10-15 centimetres apart in rows 50-75 centimetres apart. This not only allows the plants to grow robustly but also ensures each plant has enough access to sunlight and nutrients. Proper spacing also facilitates better air flow, which helps to prevent disease.

Watering is another key aspect, especially in the early stages of growth. Faba beans have moderate water needs, so keep the soil consistently moist but not too wet. Regularly check the moisture levels to avoid overwatering. As the plants mature, their water requirements might decrease, but watch out during hot spells when additional water may be needed to prevent wilting.

Integrating Faba Beans into Crop Rotations

Integrating faba beans into your crop rotations can significantly improve soil fertility and health. This strategy not only maximises the nitrogen-fixing capabilities of faba beans but also supports soil structure and prevents the depletion of key nutrients. By growing faba beans before or after high-demand crops like corn or wheat, you allow these subsequent plants to benefit from the enriched soil.

Rotating faba beans with cereal crops such as wheat and barley offers numerous advantages. It helps break cycles of disease and pests, as these crops typically do not share the same adversaries. This natural method of pest control reduces the need for chemical sprays, making farming more sustainable.

In crop rotations, faba beans act as a cover crop, protecting soil from erosion and suppressing weed growth. This reduces the pressure on the soil, allowing it to maintain its structure and moisture more effectively. The improved soil condition often results in healthier and more productive crops in future planting seasons, thus contributing to a successful and balanced farming cycle.

Conclusion

Faba beans provide a wealth of benefits when used as a nitrogen-fixing crop. By understanding how these beans naturally enrich the soil, selecting the best seed varieties, and employing effective planting techniques, you can take full advantage of their potential. Incorporating faba beans into crop rotations maximises nitrogen fixation, ensuring fertile and healthy soils for subsequent crops, while also maintaining a sustainable farming environment. This holistic approach not only boosts yields but supports long-term farm productivity.

Explore the potential of faba beans in your farming practice. Visit Shepherd Grain to discover top-quality faba beans in Australia that will enrich your soil and enhance your crops. Our experienced team is here to support your farming journey with state-of-the-art seed solutions tailored to your needs.