For anyone growing mung beans, understanding germination is the first step to a healthy crop. The tiny seeds of mung beans hold great potential, but they need the right conditions to sprout and grow into productive plants. A successful mung bean harvest starts with getting these early stages right, as this sets the foundation for robust plants and higher yields.

Growers know that optimal germination involves a mix of elements, from choosing quality seeds to preparing the right environment. Mung bean seeds require specific conditions to break dormancy and sprout effectively. By focusing on these key factors, you can enhance the germination success of your mung beans and set your farm up for a fruitful season.

Understanding Germination Requirements

Germination is a delicate phase that requires specific conditions to foster healthy development. To get the best results with mung bean seeds, it’s important to meet certain criteria:

1. Temperature: Mung beans prefer warm conditions to germinate effectively. Aim for soil temperatures between 20-30°C (68-86°F) as this range supports quicker and more uniform germination.

2. Moisture: The right amount of moisture is crucial. The soil should be consistently moist but not waterlogged. Too much water can cause seeds to rot, while too little can parch them before they get a chance to grow.

3. Soil Type: Well-draining soil is ideal for mung beans to prevent water accumulation that might harm young seedlings. Sandy loams and loamy soils are ideal as they offer both drainage and nutrient retention.

Preparing your soil to meet these conditions can significantly impact the success rate of germination. Here are some tips for ideal soil preparation:

– Weed Management: Remove any weeds that compete with mung bean seedlings for nutrients and water.

– Soil Amendments: Incorporate organic matter or compost to enrich the soil with nutrients.

– Tillage: Ensure the soil is loose and well-aerated. This not only aids root penetration but also facilitates drainage and seed to soil contact.

By ensuring these conditions, you set the stage for your mung bean seeds to sprout healthily and uniformly. This preparation not only enhances germination but also supports the early development of vigorous plants.

Importance of Seed Quality

Seed quality can make a world of difference in germination outcomes. High-quality seeds generally boast better germination rates, ensuring that a larger percentage of them develop into healthy seedlings. Here’s why seed quality matters and what makes superior seeds stand out:

– Purity: High-quality seeds are free from contaminants like weed seeds and foreign matter that can affect germination.

– Germination Rate: Premium seeds are evaluated for their ability to sprout effectively, resulting in a more uniform crop stand.

– Vigour: Seeds with high vigour not only germinate well but also establish faster and respond better to adverse conditions.

Selecting seeds with these qualities sets a strong foundation for your mung bean crop. Emphasising seed quality means investing in seeds that are more likely to result in a robust and productive harvest.

Seed Treatment and Handling

Enhancing mung bean germination often involves addressing seed treatment and handling. Treating the seeds before planting can protect them from diseases and pests, improve their ability to absorb moisture, and boost overall germination success. Common treatments include:

– Chemical Treatments: Applying protective chemicals can fend off pathogens and insects that might otherwise harm the seeds before they sprout.

– Biological Treatments: Using beneficial microbes that promote plant health can also be an effective way to encourage healthy germination and growth.

Proper handling of seeds is just as important as the treatments themselves. Before sowing, ensure seeds are stored in cool, dry conditions to prevent premature germination or deterioration. When ready to plant, handle them with care to avoid damage.

Monitoring and Adjusting Growing Conditions

Once mung bean seeds are in the ground, the work isn’t over. Ongoing monitoring of soil conditions and plant development enhances the likelihood of successful germination and healthy growth. Consider these strategies:

– Soil and Temperature Checks: Regularly check soil moisture levels to ensure they remain within the optimal range. Adjust watering methods if needed to prevent drying or waterlogging.

– Observe Plant Emergence: As seedlings begin to appear, monitor their growth. Uneven emergence might signal the need to adjust environmental conditions or address soil issues.

– Troubleshooting: Be ready to tackle common problems like poor drainage or nutrient deficiencies. Quick responses can save a struggling crop.

By keeping a close eye on these conditions and making necessary adjustments, you lay the groundwork for vigorous plant development.

Nurturing Seedlings for Strong Plant Development

As mung bean seedlings take root and grow, nurturing them properly becomes key to ensuring they mature into strong, productive plants. Proper care involves:

– Consistent Watering: Maintain steady moisture levels while avoiding extremes. Mung beans need consistent access to water but react poorly to soggy roots.

– Nutrient Management: Applying the right nutrients, such as nitrogen and potassium, promotes robust growth and development.

– Weed Control: Regularly remove weeds that compete with seedlings for the same resources.

– Protection Against Pests: Stay vigilant for pests and diseases. Employ prevention and control measures to keep your crop healthy.

With these nurturing steps, your mung bean plants are more likely to thrive, rewarding your efforts with a bountiful yield.

Getting Ready for a Successful Harvest

Successfully navigating the germination and early growth phases sets the stage for a promising mung bean harvest. By focusing on quality seeds, meticulous preparation, and attentive care, you increase the chances of achieving an abundant and healthy crop. Attending to each phase communicates your dedication to producing a thriving harvest that reflects understanding and attention to detail.

As the growing season progresses, maintaining these practices will continue to pay dividends. Whether you’re a seasoned grower or exploring mung beans for the first time, implementing these strategies provides a solid path to success.

Looking to maximise the potential of your mung bean crop with expert insights and tailored support? Shepherd Grain is here to help you get the best possible results, starting with the right foundation. Learn how our proven approach and premium mung bean seeds can support your farming goals from the ground up.

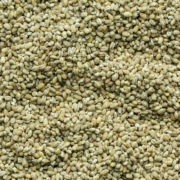
As an Australian farmer, managing pests in faba bean crops is a task you face each season. The country’s diverse climates pose unique challenges, leading to the emergence of various pests that threaten crop productivity. Proper pest management becomes essential in order to protect and secure a rewarding harvest. Strong seeds play an indispensable role in bolstering faba bean crops against these persistent pests. These robust seeds enable plants to develop with increased resilience, minimising potential damage and supporting a healthy yield.

Emphasizing the quality and potential of superior seed varieties can make a significant difference in successful pest management. With decades of experience in the agricultural sector, Shepherd Grain stands out by providing top-tier seed varieties that meet the rigorous demands of Australian farming. Their commitment ensures the delivery of seeds that promote optimal growth and resilience, paving the way for reduced pest impact and enhanced crop health.

Understanding Common Pests in Faba Beans

Australia’s vast landscapes and varied climates present a whole host of pests that can wreak havoc on faba bean crops. Understanding these pests and their impact is the first step toward effective management. Some of the most common threats include:

– Aphids: Known for sucking the sap out of plants, causing wilting and stunted growth.

– Pod Borers: These larvae burrow into the pods, diminishing yield quality.

– Thrips: Can cause major damage to flowers and pods by feeding on plant tissues.

– Weevils: They typically attack stored goods, but some species affect living crops as well.

Each pest poses distinct challenges, and their presence can lead to drastic reductions in crop yield and quality. For instance, aphids not only cause direct damage but also spread plant diseases that can further compromise crop health.

The effective management of these pests is crucial. It involves keen observation, timely interventions, and strategic planning. Prevention and control strategies help mitigate damage and ensure that the plants can thrive. One key approach is using seeds known for their strength and resilience. These seeds give crops a fighting chance against pests and reduce the dependency on chemical interventions, leading to more sustainable farming practices.

Benefits of Using Strong Seeds in Pest Management

Choosing the right seeds plays a big part in managing pest problems in faba beans. Strong seeds help in several ways, primarily by giving the plants a better shot at healthy growth. When plants grow vigorously, they’re more likely to withstand attacks from annoying pests. This robustness is often due to the genetic makeup of the seeds, which can include natural features like thicker leaves or quicker growth spurts that deter pests.

Strong seeds also lower the risk of relying too much on chemicals for pest control. If a plant grows healthy from the start, thanks to its robust genetics, it can fend off many pest problems naturally. Think of it as boosting the plant’s immune system. The stronger it is, the less it falls prey to diseases and pests. In practical terms, using strong seeds means fewer crop losses and a healthier yield, which is every farmer’s dream.

An example would be seeds developed to resist common pests like aphids. These seeds might have been cross-bred over generations to bring out desirable traits. When planted, these seeds produce faba bean plants that have fewer problems with aphid damage, reducing the need for intervention and allowing for a more sustainable farming approach.

Integrated Pest Management (IPM) Strategies

When dealing with pests, it’s essential to have a diverse toolbox. This is where Integrated Pest Management (IPM) strategies come into play. IPM has been helping farmers for years to tackle pest issues with a balanced approach. It’s all about using different methods to control pests while keeping the environment and non-target organisms safe.

Here are some key IPM strategies you can consider:

1. Crop Rotation: Changing what you plant each season helps confuse and reduce pest populations that feed on specific crops.

2. Mechanical Control: Simple techniques like traps or farming equipment adjustments can physically remove or block pest access.

3. Biological Control: Encourage natural predators like ladybugs or predatory insects to help keep pest numbers in check.

Combining strong seeds with these IPM strategies strengthens your pest management efforts. It ensures you’re not putting all your hope into just one method but instead are strategically addressing potential issues from various angles.

Best Practices for Using Strong Seeds in Faba Bean Cultivation

To get the best out of strong seeds, planting them right is just as important as choosing the right variety. Here’s how you can make sure your faba beans get off to the best start:

– Soil Preparation: Start by testing your soil to know its nutrient levels. This helps in adding the right amounts of compost or fertilizers.

– Seed Treatment: Consider treating seeds with safe biostimulants to promote germination and early plant vigour.

– Proper Planting Techniques: Maintain adequate spacing to ensure each plant gets enough sunlight and airflow, which helps in reducing disease spread.

Once the seeds are planted, keep an eye on any early signs of pest activity. Regular checks allow for prompt actions, which could be essential in stopping a small infestation from becoming a full-scale problem. Intervening early will also help maintain the overall health and quality of the crop.

Ensuring a Healthy Harvest with Strong Seeds

With a good combination of strong seeds and well-rounded pest management strategies, you set the stage for a healthy and abundant harvest. These practices reduce pest pressures and make farming more sustainable by lowering dependency on chemical inputs and enhancing the ecological balance in the field. The payoff comes in the form of a robust faba bean crop that can withstand environmental challenges and provide high-quality produce.

Embracing these comprehensive approaches ensures that your faba beans thrive. By investing in strong seeds and adopting strategic growing practices, you contribute positively to sustainable agriculture, setting a standard that not only benefits the present but also guarantees success for future cultivation.

To get the most out of your next crop, explore how using strong seed varieties can support your approach to managing faba beans in Australia. Shepherd Grain offers high-quality, resilient seeds designed to boost plant health and improve harvest outcomes.

Choosing the right Durum wheat variety for the soil you have is a bit like picking the perfect tool for a job. With varying soil types across Australia, finding the most compatible wheat variety can make a significant difference in your crop’s success. Selecting the right variety not only maximises growth potential but also helps in tackling soil-specific challenges, making life a lot easier for farmers. Durum wheat, known for its hard texture and high protein content, requires careful consideration to thrive in different soil environments.

Let’s dive deeper into understanding how Durum wheat varieties interact with the types of soils you’ll encounter on your farm. Whether you have rich loamy fields or struggle with sandy plots, knowing which variety to plant is key. This article will uncover the basics of soil types in Australian agriculture, detail how they impact wheat growth, and guide you in identifying soil types specific to your land.

Understanding Soil Types

Australia’s agricultural landscape features diverse soil types, each offering distinct advantages and challenges for cultivating Durum wheat. Below is a breakdown of the primary soil types you’ll likely encounter:

1. Clay Soils: These soils are dense and hold nutrients well, but they tend to retain water, which can lead to waterlogging. They’re common in low-lying areas and require careful drainage planning.

2. Sandy Soils: Found mainly in coastal regions, sandy soils drain quickly, reducing the risk of waterlogging. However, they tend to be low in nutrients, so you’ll need frequent fertilisation to support healthy wheat growth.

3. Loamy Soils: Often considered the ideal for farming, loamy soils strike a balance between water retention and drainage. They’re nutrient-rich and promote robust root development but may require regular amendments to maintain fertility.

4. Silty Soils: These soils are fertile and hold moisture well, making them great for growing Durum wheat. Silty soils, however, can compact easily, so avoid over-tilling and consider using organic matter to improve structure.

Knowing your soil type plays a crucial role in choosing the right wheat variety. Test your soil to determine its type and pH level, which will guide you in planning amendments and choosing the best variety for your field. The goal is to match your selected wheat variety with the soil’s natural strengths, ensuring optimal growth conditions and a plentiful harvest.

Understanding your soil type will help you make more informed decisions about which Durum wheat varieties will flourish on your land. Being familiar with the potential and limitations of each soil type allows for effective planning and management, ensuring a successful and productive growing season.

Compatible Durum Wheat Varieties

Having understood the various soil types, the next step is choosing the right Durum wheat varieties that suit these soils. Selecting a compatible variety can significantly enhance yield and simplify management in the long run. Let’s explore some popular Durum wheat varieties suited to different Australian soil conditions.

1. Coolamon: This variety thrives well in loamy soils and is known for its high grain quality and yield potential. It’s ideal for areas with moderate rainfall, making it a reliable choice for many regions.

2. Arrivato: Best suited for clay soils, Arrivato offers strong resistance to waterlogging and possesses good disease resistance. It adapts well in areas where dense, nutrient-rich soils prevail.

3. Saintly: A top performer in sandy soils, Saintly is recognised for its tolerance to drought and rapid growth in well-drained conditions. Regular fertilisation boosts its performance, ensuring satisfactory yields.

Each of these varieties is tailored to specific soil challenges, enhancing the overall productivity of your wheat farm. By selecting a variety that aligns with your specific soil type, you’re laying the groundwork for a successful harvest.

Best Practices for Planting Durum Wheat

Once you’ve chosen the appropriate variety for your soil, certain planting practices can further optimise growth. Tailoring your approach to the specific needs of your soil will ensure your crop gets the best possible start.

– Clay Soils: Prior to planting, break up compacted soil and ensure adequate drainage. Plant seeds at a shallower depth as clay holds moisture, avoiding potential waterlogging.

– Sandy Soils: Incorporate organic matter to enrich the nutrient profile, and use mulch to retain moisture. Plant seeds a bit deeper to protect them from the dry surface.

– Loamy Soils: Maintain the balance with regular nutrient tests and amendments. Ensure even seed spacing for optimal root spread and crop ventilation.

– Silty Soils: Avoid excessive tilling to preserve soil structure. Implement ridge planting to enhance drainage and aeration.

Managing water effectively is also key. Each soil type will demand a unique watering regime, so adjust as needed based on rainfall and irrigation conditions. Keeping a keen eye on soil moisture can prevent common issues like water stress or soggy roots.

Addressing Common Challenges

Various challenges can arise when cultivating Durum wheat, and each soil type may present its own set. However, understanding these challenges and how to address them can make a big difference in achieving a bountiful harvest.

– Erosion in Sandy Soils: Use cover crops to protect the soil surface, keeping the top layer stable and reducing displacement by wind or rain.

– Nutrient Deficiencies in Clay Soils: Certain amendments, like lime and gypsum, can correct soil imbalances. Regular testing will help in adjusting nutrient levels accordingly.

– Compaction in Silty Soils: Tackle compaction by integrating organic amendments like compost, which can improve soil structure and reduce surface crusting.

Selecting high-quality seeds is instrumental in mitigating growth problems. A top-notch seed variety will provide the strength and vigour needed to handle diverse soil conditions effectively.

Bringing It All Together for a Successful Harvest

Selecting the right Durum wheat variety tailored to your specific soil type is just the beginning. By following best practices in planting and tackling soil-based challenges with targeted strategies, you ensure your farm is ready for a successful growing season. Pay close attention to your soil’s needs, and adjust your approaches as required for optimal results.

A strategic selection paired with effective management practices makes all the difference. With the proper steps and a keen understanding of soil dynamics, you’re well on your way to a productive and rewarding harvest.

If you’re aiming to improve your crop results this season, understanding how different soils affect performance is a great place to start. Learn more about how to get better results with durum wheat in Australia and see how Shepherd Grain’s premium seeds and industry expertise can help you grow stronger, more reliable yields.

Growing barley successfully starts with taking good care of the seedlings. These young plants are sensitive and need the right conditions to thrive. By understanding their needs and providing a nurturing environment, farmers can set the stage for a productive barley crop.

Barley seedlings need specific temperatures, well-prepared soil, and adequate water to grow strong. It’s important for farmers to know what these plants need from the beginning, to avoid any problems later on. With proper planning and care, barley seedlings can mature into healthy plants ready to produce a good harvest.

This article guides you through the essential steps of barley seedling management. From soil preparation to pest protection, each step is crucial for helping your barley grow with vigour and resilience. Following best practices ensures that your barley seedlings have every chance to succeed in their development.

Understanding Barley Seedlings’ Needs

Barley seedlings have specific requirements that must be met for optimal growth. Getting these conditions right is key to fostering strong and resilient plants. First, temperature plays a crucial role. Barley seedlings thrive best in cooler climates, with an ideal temperature range between 10°C and 25°C. Too hot or cold can lead to poor germination or stressed seedlings.

Soil quality is another vital factor. Barley prefers well-drained soil with a neutral pH, around 6.0 to 7.5. It’s important that the soil is neither too acidic nor too alkaline, as extreme pH levels can hinder nutrient uptake. Good soil structure helps roots to grow deeply and extract the necessary nutrients and moisture.

Light and water are the next essential components. Barley seedlings need plenty of sunlight to photosynthesise effectively, which fuels their growth. Ensure that fields are positioned to receive adequate sunlight throughout the day. Water management is equally crucial, as young seedlings require consistent moisture without waterlogging. Overwatering can lead to root rot, while insufficient water slows down growth.

Understanding and meeting these needs is essential for nurturing healthy barley seedlings, setting the foundation for a successful crop.

Soil Preparation and Planting Techniques

Proper soil preparation and planting techniques are fundamental to barley seedling success. Preparing the soil well in advance can enhance seedling development and pave the way for a bountiful harvest.

Soil Preparation:

1. Testing Soil: Start by testing the soil to determine its pH level and nutrient content. This helps in identifying any amendments needed before planting.

2. Tilling: Till the soil to a depth of about 15-20 cm. This process breaks up compacted soil, improves aeration, and allows roots to penetrate more effectively.

3. Nutrient Addition: Incorporate organic matter such as compost to improve soil fertility and structure. If soil tests indicate nutrient deficiencies, apply the necessary fertilisers to balance them.

Planting Techniques:

1. Seed Selection: Choose certified high-quality seeds with high germination rates for better consistency and yield.

2. Seed Depth: Plant seeds at the correct depth, typically 2-4 cm deep. This ensures they have sufficient soil cover while still being close enough to the surface to germinate effectively.

3. Spacing: Maintain the right spacing between seeds, generally 20-25 cm apart, to allow room for growth and prevent overcrowding.

Following these soil preparation and planting techniques ensures that barley seedlings have the best start, leading to robust and healthy crop development.

Nutrient Management for Healthy Growth

Barley seedlings require a balanced diet of nutrients to grow strong and produce high yields. Essential nutrients like nitrogen, phosphorus, and potassium are crucial during the early stages of growth. These nutrients support various functions. Nitrogen boosts leaf growth and overall plant vigour, phosphorus aids in root development and energy transfer, while potassium helps in water regulation and disease resistance.

To ensure your seedlings receive these nutrients, it is vital to implement an effective fertilisation plan. Here are some tips for nutrient management:

1. Soil Testing: Before planting, conduct a soil test to identify nutrient levels and deficiencies. This gives you a clear picture of what your soil needs.

2. Balanced Fertiliser Use: Apply a balanced fertiliser that provides necessary nutrients at the recommended rates based on soil test results.

3. Timing and Method: Apply fertilisers at key growth stages, such as the pre-sowing phase and post-emergence, to ensure nutrients are available when most needed. Use methods like broadcasting or incorporating fertilisers into the soil during tilling for even distribution.

4. Foliar Fertilisation: In cases where rapid nutrient absorption is necessary, consider foliar applications, which deliver nutrients directly to plant leaves.

By carefully managing nutrients, you will help your barley seedlings develop into healthy plants with a strong foundation.

Protecting Barley Seedlings from Pests and Diseases

Barley seedlings are vulnerable to a range of pests and diseases that can severely impact their growth and yield. Common adversaries include aphids, armyworms, barley rust, and powdery mildew. These can cause damage from leaf feeding to fungal infections, ultimately weakening seedlings and reducing productivity.

Implementing an integrated pest management (IPM) strategy is an effective way to protect your seedlings. Here are some recommended practices:

1. Regular Monitoring: Keep a close eye on your crops for early signs of pest or disease outbreaks. Early detection is vital for effective control.

2. Cultural Controls: Practice crop rotation and ensure proper field sanitation to prevent pest and disease build-up.

3. Biological Controls: Where possible, utilise beneficial insects like ladybirds to naturally reduce pest populations.

4. Chemical Controls: Use pesticides and fungicides judiciously when necessary, selecting those that target specific pests or diseases while minimising harm to beneficial organisms.

5. Resistant Varieties: Plant disease-resistant barley varieties to reduce the likelihood of infections.

By taking these steps, you can create a robust defence system that keeps your barley seedlings safe from harm and supports their growth and development.

Conclusion

Effective management of barley seedlings sets the foundation for a productive and successful harvest. By understanding the specific needs of seedlings and taking careful steps in soil preparation, nutrient management, and pest protection, farmers can enhance their crops’ resilience and yield. Each stage of care, from monitoring soil health to implementing pest control strategies, contributes to healthier barley plants that are more likely to thrive. This holistic approach not only supports the immediate crop but also builds sustainable practices for future growth.

At Shepherd Grain, we are committed to providing the best resources and seed varieties to support your farming endeavours. By choosing us, you gain access to premium barley seeds and expert advice for all stages of growth. Visit our website or contact us today to learn more about how we can help you optimise your barley production.