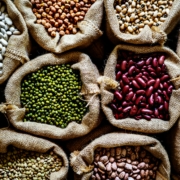
Faba beans, also known as broad beans, are a great crop for Australian farmers looking to diversify and enrich their soil. They offer numerous benefits, including nitrogen fixation, which improves soil fertility for future crops. Faba beans are also highly nutritious, providing a good source of protein, fibre, and essential vitamins and minerals. Understanding the key steps to successful faba bean farming can help you achieve bountiful harvests year after year.

Preparation and Planting Practices

Selecting the Right Seed Varieties for High Yield

Choosing the right seed varieties is the first step to a successful faba bean harvest. Look for high-yielding, disease-resistant varieties that are well-suited to your local climate and soil conditions. In 2024, some top-performing faba bean varieties include ‘Fiord’, ‘PBA Samira’, and ‘PBA Nasma’. These varieties have been selected for their excellent yield potential, good disease resistance, and adaptability to different growing environments. When selecting seeds, consider factors like plant height, maturity period, and pod characteristics to find the best match for your farm.

Soil Preparation Techniques for Optimal Growth

Proper soil preparation is crucial for the healthy growth of faba beans. Start by testing your soil to determine its pH level and nutrient content. Faba beans prefer well-drained loamy soils with a pH of 6.0 to 7.5. If your soil is too acidic, adding lime can help raise the pH to the desired level. Incorporate organic matter like compost or well-rotted manure to improve soil structure and fertility. Plough the field to a depth of about 15-20 centimetres to loosen the soil and break up any compacted areas. Follow this with harrowing to create a fine seedbed, ensuring good seed-to-soil contact for optimal germination.

Ideal Planting Times and Methods for Faba Beans

Timing your planting is essential for maximising faba bean yields. The best time to plant is late autumn to early winter when soil temperatures are between 5°C and 10°C. This allows the plants to establish before the hot summer months. Plant seeds about 5-10 centimetres deep and space them 15-20 centimetres apart within rows, with 45-60 centimetres between rows. This spacing ensures adequate airflow and reduces the risk of disease. Use machinery for precise seed placement or manual broadcasting if working on a smaller scale. After planting, ensure the soil remains moist but not waterlogged to promote strong root development.

Nutrient Management and Soil Health

Key Nutrients Required for Faba Beans

Faba beans require specific nutrients to grow well and produce high yields. The primary nutrients needed are nitrogen, phosphorus, and potassium. Nitrogen is particularly important as it promotes leaf and stem growth. Unlike other crops, faba beans can fix atmospheric nitrogen through nodules on their roots, reducing the need for additional nitrogen fertilisers. Phosphorus is crucial for root development and helps in energy transfer within the plant, while potassium aids in water regulation and overall plant health. Also, ensure your soil has adequate levels of calcium, magnesium, and sulphur, as these micronutrients support various plant functions.

Using Crop Rotation to Maintain Soil Health

Crop rotation is a proven strategy for maintaining soil health and improving faba bean yields. Rotating faba beans with cereals or other non-leguminous crops helps break pest and disease cycles, reducing the risk of soil-borne pathogens. It also helps manage nutrient levels in the soil. For example, planting faba beans after a nitrogen-depleting crop like wheat can replenish soil nitrogen levels. When planning your crop rotation, make sure to include a diverse mix of crops to promote a healthy and balanced soil ecosystem. Crop rotation enhances soil structure, prevents erosion, and reduces the likelihood of nutrient depletion.

Effective Pest and Disease Control

Common Pests and Diseases Affecting Faba Beans

Faba beans can face various pests and diseases that can affect yield and quality. Common pests include aphids, which suck sap from plants and can spread diseases, and the chocolate spot fungus, which causes dark, sunken lesions on leaves and stems. Other pests to watch for are weevils, which can damage seeds both in the field and in storage. Diseases like Ascochyta blight and rust can also affect faba beans, leading to leaf spots, stem lesions, and reduced plant vigour. Recognising these pests and diseases early helps in managing them effectively.

Early Detection and Monitoring Techniques

Early detection of pests and diseases can save your crop. Regularly inspect your plants for signs of pests or disease. Look for unusual spots on leaves, distorted or discoloured growth, and visible signs of insects. Yellow sticky traps can help monitor flying insect pests. Keep an eye on weather conditions, as wet and humid conditions can increase the risk of fungal diseases. Record your observations to identify patterns or recurring issues. Using these monitoring techniques can guide timely interventions and prevent significant crop loss.

Harvesting and Post-Harvest Handling

Indicators of When to Harvest Faba Beans

Knowing when to harvest faba beans is crucial for maximising quality and yield. Faba beans are ready for harvest when the pods turn black or dark brown, and the seeds inside are hard and firm. The plants should also have started to yellow and dry out. Harvesting too early can result in lower yields and poorer seed quality, while harvesting too late can cause seed splitting or loss. Regularly check your crop as it approaches maturity to determine the perfect time for harvest.

Proper Harvesting Techniques for Minimal Loss

Using the right techniques during harvest can minimise losses and ensure high-quality beans. If harvesting by hand, use sharp secateurs to cut the pods cleanly without damaging the plants. For mechanical harvesting, adjust the settings on your equipment to handle the firmness of faba bean pods. Aim to harvest during dry weather conditions to reduce the risk of disease and mould. Handle the beans gently to avoid splitting the seeds, and transport them carefully to the storage area.

Conclusion

Successful faba bean farming involves careful planning and attention to detail, from selecting the right seed varieties to managing soil health and controlling pests. Each step, from preparation and planting to harvesting and post-harvest handling, plays a crucial role in ensuring a thriving crop. By adopting best practices in each of these areas, you can achieve bountiful faba bean harvests year after year.

At Shepherd Grain, we are dedicated to helping farmers succeed. With over 50 years of combined experience in grain and seed, we offer expert advice and the latest seed varieties, including faba beans in Australia, to boost your yields. Contact us today for state-of-the-art seed solutions and take your faba bean farming to the next level.

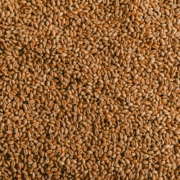
Durum wheat is a highly valued crop for many Australian farmers. Known for its hard texture and high protein content, durum wheat is the primary ingredient in pasta and other specialty products. Growing this crop can be incredibly rewarding both in terms of yield and profitability. However, selecting the right seeds is critical for achieving success with durum wheat.

Quality seeds can make a significant difference in crop performance. With the right seeds, you can expect higher germination rates, better disease resistance, and more uniform growth. All these factors contribute to a healthier, more productive crop. Choosing the best seeds involves understanding your local climate, soil type, and the specific characteristics of various durum wheat varieties.

Farmers must consider several factors when choosing durum wheat seeds. These include disease resistance, yield potential, and adaptability to local conditions. Making informed decisions about seed selection can greatly improve your chances of a bountiful harvest.

Why Durum Wheat is Valuable for Australian Farmers

Durum wheat is an important crop for many Australian farmers. Its high protein content and hard texture make it ideal for producing pasta, couscous, and other specialty products. This makes it a valuable addition to any crop rotation, offering good returns in the right markets.

One of the main reasons durum wheat is so valuable is its market demand. There is a steady demand for high-quality durum wheat, both domestically and internationally. Australian durum wheat is known for its excellent quality, making it highly sought after by pasta manufacturers and other food producers. This consistent demand helps ensure that farmers can sell their crops at a good price.

Durum wheat also offers several agronomic benefits. It has a strong root system, which helps it access water and nutrients more efficiently than some other crops. This makes it a good choice for regions with variable rainfall. Additionally, durum wheat can be a useful part of crop rotation, breaking pest and disease cycles that affect other crops like barley and chickpeas.

In summary, durum wheat is valuable for its market demand, high quality, and agronomic benefits. Growing durum wheat can help farmers diversify their income and improve their soil health, making it a smart choice for many agricultural operations.

Key Considerations for Selecting Durum Wheat Seeds

Selecting the right durum wheat seeds is essential for a successful harvest. Here are some key factors to consider when making your choice:

Climate Suitability: Different varieties of durum wheat perform better in different climates. Some are more resistant to drought, while others thrive in cooler, wetter conditions. Knowing your local climate and choosing a variety that matches it can significantly improve your yield.

Soil Compatibility: Crop performance can be influenced by soil type. While durum wheat is somewhat adaptable, some varieties may perform better in sandy soils, while others prefer heavier clay soils. Understanding your soil’s characteristics can help you choose the most compatible seed variety.

Disease Resistance: Some regions are more prone to certain diseases. Selecting a durum wheat variety that is resistant to local diseases can save you time and money on treatments. Disease-resistant varieties often yield better because they experience less stress during the growing season.

Yield Potential: Different seed varieties have different yield potentials. Look for varieties that are known for their high yields. Even within high-yield categories, pay attention to how the seeds perform in various growing conditions similar to yours.

Seed Certification and Quality: Always buy certified seeds from reputable suppliers. Certified seeds have been tested for germination rates, purity, and vigour. Using certified seeds ensures that you are starting with the highest possible quality, setting the stage for a successful crop.

By considering climate suitability, soil compatibility, disease resistance, yield potential, and seed quality, you can choose the best durum wheat seeds for your farm. Careful selection helps maximise your chances of a healthy, productive crop.

Top Durum Wheat Varieties for Different Australian Climates

Selecting the right durum wheat variety for your climate can make a significant difference in your yield and crop quality. Here are some of the top durum wheat varieties that perform well in different Australian climates:

Mace: Mace is a versatile variety known for its high yield and broad adaptability. It performs well in various regions, especially in medium to high rainfall areas. Its early maturity helps it escape the heat stress commonly experienced towards the end of the growing season.

Aurora: Aurora is another high-yielding variety suitable for a range of climates. It shows excellent performance in both northern and southern regions. Aurora is known for its good disease resistance and strong grain quality, making it a reliable choice.

Caparoi: Caparoi is particularly well-suited for drier regions. It has a good drought tolerance and performs consistently even in lower rainfall areas. Caparoi is also known for its strong resistance to diseases such as rust and septoria, making it a hardy option for challenging conditions.

Yawa: Yawa is ideal for cooler climates and performs well in southern parts of Australia. It has a high yield potential and good resistance to leaf diseases. Yawa’s grain quality also makes it a preferred choice for pasta production.

By selecting the right variety based on your local climate and growing conditions, you can optimise your durum wheat production. Each variety offers unique advantages, so choose one that aligns best with your regional requirements.

Best Practices for Growing and Harvesting Durum Wheat

To ensure a healthy and high-yielding durum wheat crop, it’s important to follow some best practices for growing and harvesting:

Soil Preparation: Start by preparing your soil well. Conduct soil tests to understand its nutrient composition and pH level. Based on the results, apply appropriate fertilisers and amendments to create an ideal growing environment. Well-prepared soil helps seeds germinate and grow strong.

Optimal Planting: Plant your durum wheat seeds at the right time and depth. Ensure uniform seed placement to promote even germination and emergence. Using a seeder can help achieve consistent depth and spacing, which is crucial for maximising yield.

Irrigation Management: Proper irrigation is key to maintaining healthy durum wheat crops. Ensure that your fields receive adequate water, especially during the critical growth stages. Over-irrigation or under-irrigation can both cause problems, so balance is key.

Weed, Pest, and Disease Control: Regularly monitor your fields for weeds, pests, and diseases. Implement integrated pest management practices to control these issues effectively. Use herbicides and pesticides as needed, but also consider crop rotation and resistant varieties as part of your strategy.

Harvest Timing: Harvest your durum wheat at the right time to ensure the best grain quality. Monitor the moisture content and aim to harvest when the grains have dried to the optimal level. Timely harvesting helps prevent losses and preserves grain quality.

Post-Harvest Handling: After harvesting, handle your grain properly to maintain its quality. Store the grains in a cool, dry place to prevent spoilage. Regularly check the storage conditions to ensure the grains remain in good condition until they are sold or processed.

By following these best practices, you can achieve a successful durum wheat crop with high yields and excellent quality. Managing soil, water, and pest control effectively are key to ensuring your crops thrive.

Conclusion

Selecting the right seeds and following best practices for growing and harvesting are crucial steps for a successful durum wheat crop. From choosing the best variety for your specific climate to ensuring optimal soil conditions, each decision you make can impact your yield and crop quality. Durum wheat offers many benefits, including high market demand and adaptability to various growing conditions, making it a valuable crop for Australian farmers.

Implementing the right strategies can help you maximise your yield and achieve high-quality grains. Understanding the nuances of your local conditions and selecting seeds accordingly give you a strong start. Coupled with effective management practices, this approach can lead to a more productive and profitable harvest.

For high-quality durum wheat in Australia, explore Shepherd Grain’s offerings. With years of experience and a commitment to quality, Shepherd Grain can help you make informed decisions for your farming needs. Visit Shepherd Grain today and take the first step towards a successful durum wheat harvest.

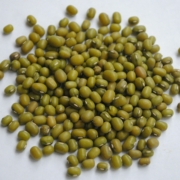
Mung beans are a versatile and valuable addition to many Australian farms. Known for their high protein content and fast-growing nature, mung beans are a great choice for rotations and soil improvement. They can fix nitrogen in the soil, making them a beneficial crop for maintaining soil health and fertility.

Factors to Consider When Selecting Mung Bean Seeds

Choosing the right mung bean seeds is the first step to a productive harvest. Here are some important factors to consider:

  1. Climate Adaptability: Ensure the mung bean variety you select is well-suited to your region’s climate. Some varieties perform better in cooler areas, while others thrive in warmer conditions. Choose a variety that matches the local weather patterns for better growth and yield.
  2. Disease Resistance: Opt for mung bean varieties that resist common diseases. Mung beans can be susceptible to diseases like powdery mildew and bacterial blight. Using disease-resistant seeds can reduce the need for chemical interventions and help maintain healthier plants.
  3. Seed Quality: High-quality seeds are essential for successful germination and growth. Look for seeds with high germination rates and vigour. At Shepherd Grain, we source seeds from a wide area to ensure the highest standards of purity and vitality.
  4. Yield Potential: Consider the yield potential of different mung bean varieties. Some varieties produce more beans per hectare, making them a more profitable choice. Evaluate historical yield data to select a variety that offers the best return on investment.
  5. Maturity Period: The time it takes for mung beans to mature varies between varieties. Choose a variety that fits your farming schedule. Early-maturing varieties can help you fit mung bean crops into tight rotation plans.

By considering these factors, you can select the best mung bean seeds for your farm, ensuring a healthy and abundant crop.

Top Mung Bean Varieties for Australian Farms

Selecting the right mung bean variety can significantly impact your crop’s success. Here are some top mung bean varieties suitable for Australian farms:

  1. Crystal: Crystal mung beans are known for their high yield and shorter growing season. They mature quickly, making them ideal for rotations. This variety also has good resistance to foliar diseases, which helps maintain plant health.
  2. Jade-AU: Jade-AU is a popular variety due to its excellent yield potential and disease resistance. It performs reliably in various soil types and climates, making it a versatile choice for many farmers.
  3. Regeneration: This variety is celebrated for its robustness and adaptability. Regeneration mung beans can withstand harsher conditions, making them suitable for regions with unpredictable weather. They also show strong resistance to common pests and diseases.
  4. VELOCE: VELOCE mung beans are favoured for their high protein content and fast growth. They are particularly good for regions with shorter growing seasons, ensuring a quick turnaround from planting to harvest.
  5. Satin II: Known for its uniform pod and bean size, Satin II offers consistent quality and yield. This variety is also resistant to several common diseases, reducing the need for extensive chemical treatments.

When selecting a variety, consider your farm’s specific conditions and needs. Each of these varieties offers unique benefits that can help you achieve a successful mung bean harvest.

Soil Preparation and Planting Techniques for Mung Beans

Proper soil preparation and planting techniques are crucial for growing healthy mung beans. Begin with a soil test to understand your soil’s nutrient levels and pH. Mung beans prefer a pH range of 5.5 to 7.0. If needed, add lime to adjust the pH. Good soil structure ensures proper root development and water absorption.

Steps for Effective Soil Preparation:

  1. Tilling: Start by tilling the soil to break up any clumps and create a fine seedbed. This helps roots penetrate more easily and ensures uniform growth.
  2. Fertilization: Incorporate organic matter like compost or well-rotted manure to improve soil fertility. Mung beans benefit from phosphorus during the early stages, so consider a balanced fertiliser application.

Planting Techniques:

  1. Seed Selection and Treatment: Choose high-quality seeds that are treated to resist diseases and pests. Seeds sourced from Shepherd Grain guarantee high germination rates and vigour.
  2. Planting Depth and Spacing: Plant mung bean seeds about 2-3 centimetres deep and space them 10-15 centimetres apart in rows. Ensure rows are spaced around 45-60 centimetres apart to facilitate air circulation and ease of maintenance.
  3. Watering: Water the seeds thoroughly after planting to promote good seed-to-soil contact. Consistent moisture is crucial during germination, but avoid waterlogging the soil.

These techniques ensure a solid start for your mung beans, promoting healthy and robust growth right from the beginning.

Managing Pests and Diseases in Mung Bean Cultivation

Preventing and managing pests and diseases is essential to maintain a healthy mung bean crop. Here are some effective strategies:

Common Pests:

  1. Aphids: These small insects can damage plants by sucking their sap. Control aphids by introducing natural predators like ladybirds or using insecticidal soap.
  2. Helicoverpa Caterpillars: These pests can be extremely destructive, feeding on pods and leaves. Use pheromone traps to monitor and control their population.
  3. Spider Mites: These tiny pests can cause yellowing of leaves. Regularly spray plants with water to knock off mites and use miticides if necessary.

Common Diseases:

  1. Powdery Mildew: This fungal disease appears as white powder on leaves. To manage it, ensure good air circulation and remove affected plant parts. Fungicides can also be used if the infection is severe.
  2. Bacterial Blight: This disease causes water-soaked spots on leaves and pods. Use disease-free seeds and practice crop rotation to manage bacterial blight.
  3. Root Rot: Poorly drained soil may lead to root rot. Ensure proper drainage and avoid overwatering to prevent this issue.

Preventative Measures:

– Crop Rotation: Rotate your crops to avoid the build-up of pests and diseases in the soil. Avoid planting mung beans in the same area for consecutive seasons.

– Clean Farming Practices: Remove plant debris and weeds from your fields, as they can harbour pests and diseases. Keep equipment clean to avoid spreading pathogens.

Monitoring and Early Intervention:

– Regular Inspections: Frequently inspect your mung bean plants for signs of pests and diseases. Early detection allows quicker intervention, reducing damage to your crops.

– Integrated Pest Management (IPM): Combine biological, cultural, and chemical methods to control pest populations sustainably. This approach minimises chemical use and promotes healthier plants.

By implementing these strategies, you can keep your mung bean crops healthy and productive, ensuring a good harvest.

Conclusion

Growing mung beans involves various steps, from selecting the right seeds to managing soil, pests, and diseases effectively. Each step requires attention and care to ensure your mung beans grow healthy and yield well.

The choice of seed variety plays a key role in resisting diseases and yielding better crops. Effective soil preparation and planting techniques pave the way for robust growth, while diligent pest and disease management protect your plants throughout their lifecycle.

At Shepherd Grain, we understand the complexities of mung bean cultivation. With over 50 years of combined experience, we provide high-quality seed varieties and expert advice to help farmers succeed. Ready to boost your mung bean production with top-notch seeds and proven farming techniques? Contact Shepherd Grain today and take the first step towards a bountiful mung bean harvest.

Choosing the right durum wheat seeds is essential for a successful farming season. Durum wheat is popular for making pasta and other high-quality food products, so selecting the best seeds can significantly impact your yield and crop quality. Superior seeds not only ensure higher germination rates but also offer better disease resistance and adaptability to various soil types.

Different durum wheat varieties bring unique advantages, such as higher yields, improved drought tolerance, and resistance to specific pests. Understanding these factors can help you make an informed decision that will maximise your farm’s productivity. With the right seed selection, you set the stage for a healthy and abundant harvest.

Planting practices also play a crucial role in the success of your durum wheat crops. From soil preparation to planting depth, every detail matters. Combining the right seed varieties with optimal planting techniques can dramatically increase your yield. In this guide, we will go through key factors for selecting durum wheat seeds, explore top-rated seed varieties, discuss the best planting practices, and show how Shepherd Grain can help you boost your yield with superior seeds.

Key Factors in Selecting Durum Wheat Seeds

Selecting the right durum wheat seeds involves several important factors. Each one can affect the overall health and yield of your crops. Understanding these factors will help ensure you choose the best seeds for your farm.

  1. Climate Adaptability: The first thing to consider is how well the seeds can adapt to your local climate. Some durum wheat varieties perform better in dry conditions, while others thrive in more temperate climates. Knowing your local weather patterns can help you select seeds that will grow well throughout the season.
  2. Soil Compatibility: Different wheat varieties have varying requirements when it comes to soil. Some seeds perform best in sandy soils, while others need clay or loamy soils. Test your soil to understand its type and pH level, then choose seeds that match those conditions.
  3. Disease Resistance: Disease can quickly ruin a crop. Opt for seeds that are bred to resist common diseases like rust or Fusarium. Disease-resistant seeds will help ensure a healthier crop and reduce the need for chemical treatments.
  4. Yield Potential: High-yield seeds are designed to produce more harvest per hectare. Look for seeds known for their high yield potential to maximise your output and profitability.
  5. Maturity Period: The time it takes for the wheat to mature is also crucial. Some varieties have a shorter growing period, making them ideal for areas with shorter growing seasons. Others take longer but may offer better results in the end.

By paying attention to these key factors, you can select durum wheat seeds that will perform well on your farm. This ensures you plant the best possible seeds for high yield and healthy crops.

Top-Rated Durum Wheat Varieties for Australian Farms

Choosing from the top-rated durum wheat varieties can help you achieve excellent yields and high-quality crops. Here are some of the best options for Australian farms:

  1. Caparoi: Known for its strong resistance to diseases such as leaf rust and stem rust. Caparoi also performs well in various soil types and has a high yield potential, making it a favourite among farmers.
  2. EGA Bellaroi: This variety offers excellent grain quality and strong resistance to yellow leaf spot. It is suited for areas with medium to high rainfall and is known for its consistent performance.
  3. Saintly: Saintly durum wheat is well-regarded for its adaptability to different climates and soil types. It has good drought tolerance and offers high yield potential, making it a reliable choice for various farming conditions.
  4. Tamaroi: Tamaroi is excellent for regions with lower rainfall. It has a robust resistance to leaf rust and offers a good balance of yield and quality. This makes it highly adaptable to different farming environments.
  5. DBA Bindaroi: Known for its exceptional grain quality and strong resistance to foliar diseases. DBA Bindaroi is ideal for areas prone to high disease pressure and delivers high yield potential.

Selecting from these top-rated durum wheat varieties can help you achieve better results on your farm. Each variety offers unique benefits, so you can choose the one that best suits your specific farming needs and conditions. Investing in high-quality seeds is the first step towards a successful and productive harvest.

Best Planting Practices for Durum Wheat

Planting durum wheat successfully involves following best practices to ensure optimal growth and yield. Here are some essential steps to consider:

  1. Soil Preparation: Start by testing your soil to understand its composition and nutrient levels. Ensure the soil is well-drained and has a pH level between 6.0 and 7.5. Apply necessary fertilisers to balance the nutrients and prepare the soil by tilling it to create a fine seedbed.
  2. Seed Depth and Spacing: Plant durum wheat seeds at a depth of about 2 to 4 centimetres. Proper depth ensures better germination and protects the seeds from birds. Space the seeds evenly to prevent overcrowding, which can lead to poor air circulation and increased disease risk.
  3. Planting Time: Timing is critical for durum wheat planting. In Australia, the best time to plant is usually in late autumn to early winter. This timing allows the wheat to establish roots before the intense heat of summer, leading to better growth.
  4. Watering: Durum wheat needs adequate moisture for germination and early growth. Ensure the soil remains moist but not waterlogged. Once the plants are established, they are more tolerant of dry conditions but still need regular watering during key growth stages.
  5. Weed Control: Weeds compete with wheat for nutrients, water, and sunlight. Use herbicides or mechanical weeding methods to keep your fields clear of weeds, especially during the early stages of growth.

By following these best planting practices, you can enhance the growth and yield of your durum wheat. Proper preparation and care will help your seeds thrive, leading to a successful harvest.

Enhancing Your Durum Wheat Yield with Shepherd Grain’s Superior Seeds

Selecting high-quality seeds is just the beginning. Enhancing your durum wheat yield involves a combination of superior seeds and expert practices. At Shepherd Grain, we source the best durum wheat seeds with high germination rates, vigour, and purity. Our seeds are treated with state-of-the-art chemical applications to protect against diseases and pests, ensuring healthy growth from the start.

  1. Wide Area Sourcing: We source our seeds from a broad area to ensure the highest germination and purity. This diverse sourcing allows us to offer seeds that are well-suited to different soil types and climate conditions.
  2. Expert Knowledge: With over 50 years of combined experience in grain and seed, Shepherd Grain provides valuable insights and support to help you succeed. Our expertise ensures you get the best advice on seed selection and planting practices.
  3. Advanced Treatments: Our superior seeds undergo advanced chemical treatments to enhance their resistance to diseases and pests. This leads to healthier plants and higher yields without the need for excessive chemical inputs later on.
  4. Quality Assurance: Each batch of seeds is thoroughly tested for germination, vigour, and purity. Our rigorous quality control processes ensure you receive only the best seeds, giving you a strong start to your growing season.

By choosing Shepherd Grain’s superior seeds and following our expert advice, you can significantly enhance your durum wheat yield. Our commitment to quality and innovation ensures your farming success.

Conclusion

Selecting the right durum wheat seeds and following best planting practices are crucial steps to ensuring a bountiful harvest. High-quality seeds offer better resistance to diseases and pests and are adapted to various soil and climate conditions, giving you an edge in achieving high yields. Coupled with proper planting techniques, your durum wheat crops will thrive, leading to a successful farming season.

At Shepherd Grain, we are committed to providing top-quality durum wheat seeds and expert support to help you achieve your farming goals. Our wide area sourcing, state-of-the-art seed treatments, and over 50 years of combined experience in grain and seed set us apart as a trusted partner for Australian farmers.

Investing in superior seeds and following best practices will not only enhance your yield but also ensure the sustainability and profitability of your farming operations. Make the smart choice this season by choosing Shepherd Grain’s high-quality durum wheat seeds.

Ready to boost your durum wheat yield? Contact Shepherd Grain today to get the best seeds and expert advice for a successful harvest!

Ensuring high germination rates is crucial for achieving successful crop establishment. One of the key factors in achieving this is the quality of the seeds you start with. High-quality seeds not only improve germination rates but also set the foundation for healthy and robust crops. Whether you are growing chickpeas, wheat, barley, durum, faba beans, or mung beans, the importance of sourcing quality seeds cannot be overstated.

High-quality seeds possess excellent germination rates, vigour, and purity. These seeds are less likely to be affected by diseases and pests, and they generally produce stronger seedlings. The journey to a healthy crop starts with selecting the right seeds, which can often mean the difference between a bountiful harvest and a disappointing yield.

Assuring seed quality involves understanding the factors that affect seed performance, such as environmental conditions, storage practices, and seed treatments. By paying attention to these elements and adhering to best practices for sourcing and planting, you can significantly improve your crop’s success. This guide aims to provide you with comprehensive insights into ensuring high germination rates through quality seed sourcing.

Understanding the Importance of Seed Quality

How Seed Quality Affects Germination Rates

The quality of the seeds you plant directly affects the percentage of seeds that successfully sprout and grow into healthy plants. High-quality seeds generally exhibit higher germination rates, meaning a larger proportion of them will sprout under optimal conditions. Good germination rates ensure better crop stands, reducing the need for replanting and leading to a more uniform crop. This uniformity is important for optimal water and nutrient use, making the crop more efficient and productive.

Key Indicators of High-Quality Seeds

High-quality seeds possess certain characteristics that indicate their potential for successful growth. Look for seeds that are clean and free from debris. They should be uniform in size, which ensures even planting depth and germination. Seeds should also be plump and well-filled, indicating they have the energy reserves necessary for strong initial growth. Check for seed purity—high-quality seeds should have minimal contamination from other seeds, weeds, or inert matter. Finally, certified seeds often come with documentation verifying their germination rates and purity levels, offering an extra layer of assurance.

Common Issues with Low-Quality Seeds

Low-quality seeds present several issues that can compromise your crop’s success. They often have lower germination rates, meaning fewer seeds will sprout, leading to gaps in the field. These gaps can result in lower yields and inconsistent crop stands. Poor-quality seeds may also carry diseases or pests, which can spread to healthy plants and reduce overall crop health. Additionally, seeds that are damaged or underdeveloped often lack the vigour needed to compete with weeds and may fail to thrive in less-than-ideal conditions.

Factors Influencing Germination Rates

Environmental Conditions

Environmental conditions play a crucial role in seed germination. Temperature, moisture, and soil type all affect how well seeds germinate. Most seeds require a specific temperature range to sprout effectively. For example, wheat seeds germinate best between 12-25°C, whereas mung beans prefer warmer temperatures around 25-30°C. Adequate moisture is essential, as seeds need water to activate the growth process. Additionally, soil type can impact germination—well-drained, loamy soils are usually ideal.

Seed Storage and Handling Practices

Proper storage and handling of seeds are key to maintaining their quality and viability. Store seeds in a cool, dry place to prevent moisture uptake and fungal growth. Use airtight containers to keep out pests and maintain a consistent temperature. Avoid extreme temperatures, as they can reduce seed viability. Handling seeds gently during transport and planting helps prevent physical damage. Regularly check stored seeds for signs of spoilage or pests.

The Role of Seed Treatments

Seed treatments can enhance germination rates and protect young seedlings from diseases and pests. Chemical treatments, such as fungicides or insecticides, can prevent fungal infections and insect damage. Biological treatments, like beneficial microbes, can boost seedling growth and improve soil health. Additionally, some seeds are coated with nutrient-rich substances to support initial growth. Using treated seeds can reduce the need for early pesticide applications and provide a stronger start for your crop.

Best Practices for Sourcing Quality Seeds

Selecting Reputable Seed Suppliers

Choosing the right seed supplier is a critical step in sourcing quality seeds. Reputable suppliers have established track records and provide high-quality products. Look for suppliers who offer detailed information about their seeds, including germination rates, purity levels, and treatments. It’s also important to select suppliers with third-party certifications and industry accreditations. These credentials ensure that the seeds meet specific quality standards. Visit supplier facilities if possible to see their processes firsthand and verify their claims about seed quality. Reliable suppliers will gladly answer any questions you have about their products.

Benefits of Using Certified Seeds

Certified seeds come with numerous benefits that contribute to high germination rates and crop success. These seeds undergo rigorous testing for purity, germination rates, and disease resistance, ensuring you get a superior product. Certified seeds also come with guarantees regarding their genetic identity and quality, giving you peace of mind. Additionally, using certified seeds can lead to uniform crop stands and reduced competition from weeds, which ultimately enhances yield and profitability. By investing in certified seeds, you not only ensure high germination rates but also improve the overall health and productivity of your farm.

Evaluating Seed Purity and Viability

Evaluating the purity and viability of seeds before planting is crucial. Seed purity refers to the absence of contaminants such as weeds, other crop seeds, or inert matter. You can assess purity by examining a seed sample and checking the supplier’s analysis report. Viability, on the other hand, indicates the percentage of seeds expected to germinate under optimal conditions. Conduct a germination test at home by planting a small sample of seeds in a controlled environment and observing the results. By ensuring both purity and viability, you significantly increase the chances of a successful crop.

Optimising Seedling Establishment for High Germination

Preparing the Soil for Planting

Proper soil preparation is essential for good seedling establishment. Start by clearing the field of weeds and debris, which can compete with your seeds for water and nutrients. Next, test the soil to determine its pH and nutrient levels. Most crops, like chickpeas and wheat, prefer a pH range of 6.0 to 7.5. Amend the soil as needed to correct pH levels and incorporate organic matter to improve soil structure. Tilling the soil can help improve aeration and drainage, making it more conducive to seed germination.

Proper Planting Techniques

Using correct planting techniques can greatly enhance germination rates. Ensure seeds are planted at the right depth; this varies depending on the crop but is generally around 2-5 centimetres for most grains and legumes. Spacing is equally important; adequate spacing between seeds ensures they have enough room to grow and access nutrients. Use a planter or drill to achieve uniform planting depth and spacing. After planting, light watering can help settle the soil around the seeds, providing the moisture necessary for germination.

Monitoring Seedlings for Early Issues

Early detection of problems in seedlings can prevent larger issues later on. Regularly inspect your fields for signs of diseases, pests, or nutrient deficiencies. Common problems include yellowing leaves, stunted growth, and poor germination rates. Address any issues promptly—apply the necessary treatments or adjustments to mitigate problems. Regular monitoring helps ensure that seedlings get off to a strong start, leading to a healthier and more productive crop.

Conclusion

Sourcing high-quality seeds is a fundamental step towards achieving high germination rates and successful crop outcomes. By understanding the importance of seed quality and considering factors like environmental conditions, handling practices, and seed treatments, you can make informed decisions that benefit your farming operations. Taking the time to select reputable suppliers and using certified seeds significantly boosts your chances of a bountiful harvest. Moreover, optimising soil preparation and planting techniques ensures that your seeds have the best possible start.

At Shepherd Grain, we understand the critical role of quality seeds in crop success. With over 50 years of combined experience, we provide the latest seed varieties and cutting-edge seed treatments to maximise your farming potential. Contact our expert grain company today to learn how we can support your success with top-notch seeds and expert advice.

Choosing the right chickpea seeds can make a big difference for your farm. It can affect how much you harvest and the quality of the chickpeas you grow. When selecting seeds, many factors come into play, such as the climate of your farm, the type of soil you have, and what the market needs. Getting these right can help you grow healthier and more abundant crops.

It’s important to consider how resistant the seeds are to diseases and how well they tolerate different weather conditions. Also, knowing the growth cycle and the time it takes for the plants to mature can help you plan better. The size of the seeds and the potential yield are crucial too. High germination rates and vigour are signs of strong seeds that will grow well in your fields. By investing in good quality seeds from trusted suppliers, you can ensure a productive and profitable farming season ahead.

Understanding these factors and how they influence your crop can help you make better choices. With carefully selected seeds, you can boost your farm’s production and meet the demands of your customers.

Understanding the Importance of Choosing the Right Chickpea Seed

Choosing the right chickpea seed is essential for your farm’s success. Seed selection directly affects the yield you get and the quality of the chickpeas you produce. High-quality seeds result in healthier plants that can produce more chickpeas. Poor seed selection, on the other hand, can lead to lower yields and poor-quality produce, which affects your profits.

When picking chickpea seeds, think about the climate of your farm. Some chickpea varieties thrive in specific weather conditions. Also, consider the soil type. Different seeds perform better in different soil types, whether sandy, clay, or loamy. Lastly, think about the market demand. Growing a variety that’s in high demand ensures you can sell your produce quickly and at a good price.

Key Factors to Consider When Selecting Chickpea Seeds

Disease Resistance and Tolerance

One major factor in seed selection is disease resistance. Chickpeas can be prone to several diseases like Ascochyta blight and Fusarium wilt. Picking seeds that are resistant to these diseases ensures healthier plants and better yields. Disease resistance reduces the need for chemical treatments, saving you time and money.

Growth Cycle and Maturation Period

Understanding the growth cycle and maturation period of the seeds you select is vital. Some chickpea varieties mature quickly, while others take longer. If your growing season is short, opt for a variety that matures early. This ensures the plants have enough time to grow and produce harvestable chickpeas.

Yield Potential and Seed Size

Yield potential is another key consideration. You want seeds that will produce a high number of chickpeas. Larger seeds often indicate robust growth and higher yield potential. Picking seeds that promise a good yield helps maximise your farm’s productivity and profits.

Consideration of Seed Purity, Germination Rates, and Vigour

Make sure the seeds you choose have high purity, germination rates, and vigour. Purity means the seeds are free from contaminants. High germination rates mean most seeds will sprout and grow into plants. Vigour refers to the seed’s ability to grow strong seedlings. Buying seeds with these qualities ensures a successful and productive growing season.

Comparing Popular Chickpea Varieties

Several chickpea varieties are available in Australia, each with unique traits. Some of the popular varieties include PBA Slasher, PBA Seamer, and Genesis 090. PBA Slasher is known for its high yields and adaptability to various climates. It works well in different soil types and has good disease resistance. PBA Seamer offers great resistance to Ascochyta blight and is an early maturing variety, making it perfect for shorter growing seasons.

Genesis 090 is another favourite. It’s a desi chickpea with excellent disease resistance and performs well in different environmental conditions. However, it might need more care in weed management compared to the other two varieties.

To choose the best variety for your farm, consider your specific needs. If you face a lot of disease issues, PBA Seamer might be the best fit. For higher yields and versatility, go with PBA Slasher. If you want a hardy variety that can thrive in multiple conditions, Genesis 090 could be your choice. Assessing your farm’s specific conditions and your goals helps in making the best decision.

Tips for Buying High-Quality Chickpea Seed

Where to source quality chickpea seeds is crucial. To get the best seeds, consider purchasing from trusted suppliers with good industry experience. Suppliers with a long track record often provide high-quality seeds with high germination rates.

Buying from experienced suppliers has its benefits. They offer the latest seed varieties that have been tested and proven to perform well. They also use state-of-the-art seed chemical applications to protect seeds from diseases and pests.

Follow these steps to ensure you are getting the best seeds:

– Research potential suppliers and read reviews.

– Ask about the source of the seeds and their testing methods.

– Check if the seeds come with information on germination rates and vigour.

– Look for suppliers who use modern seed treatments to ensure healthy crops.

Making sure you get high-quality seeds means better harvests and healthier plants.

Conclusion

Choosing the best chickpea seed for your farm is vital for a successful harvest and a profitable season. By understanding the importance of seed selection and considering factors like disease resistance, growth cycle, and seed quality, you can make informed choices. Knowing the differences between popular chickpea varieties helps in picking the perfect fit for your farm’s specific needs.

Additionally, sourcing seeds from trusted suppliers ensures you get the best quality, equipped with modern treatments to protect your crops. It all comes down to making smart decisions that will benefit your farm in the long run.

Ready to take the next step? Connect with Shepherd Grain today and let us help you find the best bulk chickpeas for your farm, ensuring a fruitful and successful growing season.

Growing mung beans can be a rewarding venture, providing nutritious and high-protein crops for various uses. Whether you’re a seasoned farmer or a beginner, understanding the essentials of mung bean cultivation is crucial for success. From selecting the right varieties to ensuring optimal soil conditions, each step requires careful attention to detail.

Mung beans are adaptable and can thrive in a range of climates, making them a versatile addition to your crop rotation. However, choosing the right variety suited to your region’s climate and soil type can significantly impact your yield. It’s important to consider traits such as drought tolerance and disease resistance when selecting your seeds.

Proper field preparation is equally essential. Mung beans flourish in well-drained soils and need specific nutrients to grow strong and healthy. Implementing the right field preparation techniques can set the stage for a successful growing season. In addition, understanding the right planting depth and spacing helps ensure that your mung beans have the best start.

With the right irrigation methods and pest management practices, your crop can thrive throughout the growing season. By the time harvest comes around, knowing the best techniques for harvesting and storage will help you retain the quality and quantity of your yield. This guide aims to provide you with all the information you need to grow mung beans successfully, ensuring a productive and profitable harvest.

Choosing the Perfect Mung Bean Varieties

Key Characteristics to Consider

When selecting mung bean varieties, focus on key characteristics that impact yield and quality. Look for varieties with good disease resistance to common issues like powdery mildew and Cercospora leaf spot. This reduces the need for extensive chemical control. Yield potential is another important trait; high-yielding varieties ensure better return on investment. Also, consider the maturity period—early-maturing varieties can provide quicker returns while late-maturing types might offer higher biomass. These characteristics help determine the best variety for your needs.

Regional Adaptability

Matching mung bean varieties to your farm’s regional conditions is essential for success. Different varieties thrive under different climate and soil conditions. In tropical and subtropical regions, opt for varieties that can handle high temperatures and humidity. For semi-arid areas, drought-tolerant varieties are crucial. Consider your region’s average rainfall and temperature patterns when choosing a variety. Varieties suited to your specific conditions will perform better and produce higher yields.

Advantages of Certified Seeds

Using certified seeds offers distinct benefits that ensure your crop’s vigour and productivity. Certified seeds are tested for purity, germination rate, and freedom from disease, ensuring you start with high-quality seeds. These seeds often come with detailed planting and care instructions, tailored to maximise their genetic potential. By investing in certified seeds, you can achieve consistent and reliable crop performance, leading to better overall yields.

Preparing Your Fields for Mung Beans

Ideal Soil Conditions

Mung beans grow best in well-drained loamy or sandy soils with a pH between 6.3 and 7.2. The soil should be rich in organic matter to support healthy plant growth. Avoid heavy clay soils that retain too much water, as this can lead to root diseases. Conduct a soil test before planting to determine nutrient levels and pH. Adjusting soil conditions to meet these requirements promotes strong mung bean growth.

Field Preparation Steps

Successful mung bean cultivation begins with thorough field preparation. Start by clearing the field of weeds and crop residues. Plough the soil to a depth of about 15-20 centimetres to improve aeration and drainage. Following this, apply organic matter such as compost or well-rotted manure to enrich the soil. Level the field to ensure even planting and irrigation. Proper field preparation creates the optimal environment for mung bean germination and growth.

Planting Depth and Spacing Guidelines

Planting depth and spacing greatly influence the germination and growth of mung beans. Sow seeds at a depth of 3-5 centimetres to prevent them from drying out and to protect them from pests. Space the seeds 4-5 centimetres apart within rows to ensure each plant has enough room to grow. Maintain a row spacing of 30-45 centimetres to facilitate air circulation and ease of cultivation. Following these guidelines ensures healthy plant establishment and maximises yield potential.

Mung Bean Crop Management

Irrigation Techniques for Optimised Growth

Mung beans need consistent moisture for optimal growth, especially during flowering and pod development. Drip and sprinkler irrigation systems are ideal as they provide even water distribution. Water the plants deeply but infrequently to encourage deep root development. Typically, mung beans require about 25-30 mm of water per week. Keep an eye on soil moisture levels and adjust irrigation schedules accordingly, particularly during dry spells. Proper irrigation techniques help prevent water stress and promote robust growth.

Pest and Disease Management

Effective pest and disease management is crucial for healthy mung bean crops. Common pests include aphids, whiteflies, and thrips, which can damage the plants and reduce yields. Regular field monitoring helps in early detection and control. Use integrated pest management practices, combining biological controls and selective pesticides for better results.

Diseases like powdery mildew and Cercospora leaf spot can be managed through crop rotation, resistant varieties, and appropriate fungicide applications. Remove and destroy infected plant debris to prevent disease spread. Implementing these strategies ensures a healthy crop and maximises yields.

Nutrient Requirements and Fertilisation

Mung beans need a balanced supply of nutrients for strong growth. Start with a soil test to identify nutrient levels and deficiencies. Commonly, mung beans require phosphorus and potassium for root development and pod formation. Apply these nutrients before planting as per the soil test recommendations.

During the growing season, watch for signs of nutrient deficiencies, such as yellowing leaves, and address them promptly. Regularly apply organic matter or balanced fertilisers to maintain soil fertility. Meeting the nutrient requirements of mung beans ensures vigorous plant growth and higher yields.

Harvesting and Storage Best Practices

Timing Your Harvest

Harvest timing is critical to maximise the yield and quality of mung beans. The best time to harvest is when 85-90% of the pods have matured and turned black. Waiting too long can cause the pods to shatter, leading to seed loss. Regularly monitor the crop as it nears maturity to determine the right harvest time. Picking the beans at the ideal time helps retain their quality and quantity.

Harvesting Methods for Maximum Yield

For large-scale operations, combine harvesters are efficient and effective. Ensure the combine settings are adjusted to minimise seed damage and pod shattering. For smaller fields, manual harvesting can be practical. Pick the pods early in the morning or late in the evening to reduce moisture variability. Handle the plants gently to prevent losing seeds. Using proper harvesting methods ensures maximum yield and quality beans.

Proper Storage Techniques to Maintain Quality

Storing mung beans properly is essential to maintain their quality. Ensure that the beans are thoroughly dried to a moisture content of around 12% before storage. Use well-ventilated storage facilities to prevent mould growth. Keep the storage area clean and free from pests. Regularly inspect the stored beans for any signs of spoilage or pest infestation. Using these storage techniques helps retain the beans’ quality for a longer period.

Conclusion

Growing mung beans successfully involves a series of well-planned steps, from choosing the best varieties to mastering field preparation, crop management, and harvesting techniques. Each stage plays a critical role in ensuring a healthy and productive crop. By focusing on regional adaptability, proper irrigation, effective pest control, nutrient management, and timely harvesting, you can maximise your mung bean yield and quality.

As your trusted seed supplier, we at Shepherd Grain offer the latest seed varieties and state-of-the-art seed treatments backed by over 50 years of combined experience. Our high-quality seeds and expert advice can support your farming goals. Contact Shepherd Grain today to learn more about how we can help you achieve a successful mung bean harvest.

Growing high-quality barley requires making informed seed choices. The type of barley seed you choose can significantly impact your yield and the quality of your crop. To ensure success, it is essential to understand the different types of barley seeds available and their specific benefits. Knowing the advantages and limitations of each type helps you make the best decision for your farm.

Selecting the right barley seed is not just about choosing the highest-yielding variety. Factors such as climate adaptability, disease resistance, and market demand also play a crucial role. By carefully considering these aspects, you can pick a seed variety that meets your farm’s unique needs and conditions. 

Understanding the Types of Barley Seeds

In Australia, barley farmers can choose from various seed types. The two primary categories are malting barley and feed barley. Malting barley is grown for the brewing industry, while feed barley is used in animal feed. Each type has specific characteristics that cater to different market needs. Malting barley must meet stringent quality standards, whereas feed barley has more flexibility.

Differences Between Malting and Feed Barley

Malting barley is selected for its high enzyme content, which is essential for converting starches into sugars during the brewing process. It also requires low protein levels to ensure a good malt quality. In contrast, feed barley varieties are chosen for their high protein content and digestibility, which benefit livestock nutrition. These differences make each type suited to distinct market demands and end-uses.

Advantages and Limitations of Each Type

Malting barley offers higher market prices but comes with stricter quality requirements. It needs careful management and optimal growing conditions to meet these standards. Feed barley is easier to grow and less demanding in terms of quality checks, but it usually fetches a lower market price. Understanding these trade-offs can help you decide which type aligns best with your farming goals and market strategies.

Factors to Consider in Seed Selection

1. Climate Adaptability and Growing Conditions

Choosing the right barley seed involves understanding your local climate and soil conditions. Different barley varieties have varying tolerance to temperature, rainfall, and soil types. Seeds that thrive in one region may not perform well in another. For example, some varieties are drought-tolerant, making them ideal for dry areas, while others require more water and are better suited for wet climates.

2. Disease Resistance and Pest Tolerance

Barley crops are susceptible to various diseases and pests, such as rust, mildew, and aphids. Selecting seed varieties with strong disease resistance and pest tolerance can save you time and money on chemical treatments. Look for seeds that have been bred to resist the most common threats in your area. This proactive approach helps maintain healthy crops and maximise yields.

3. Yield Potential and Market Demands

Yield potential is another critical factor in seed selection. High-yield varieties can increase your overall production, but it’s important to consider the quality of the yield as well. Additionally, take into account the market demand for different barley types. Growing a variety that is in high demand can boost your profitability. Balancing yield potential with market needs ensures that you grow a crop that is both productive and profitable.

Top Barley Seed Varieties for High Yields

Several barley varieties stand out for their high yield potential and resilience. For example, Compass is well-regarded for its excellent yield and strong disease resistance. It performs well across various climates, making it a versatile choice for many farmers. La Trobe is another high-yielding variety, prized for its malting quality and rapid growth. 

It’s particularly suited for growers targeting the brewing industry. Spartacus CL offers good yields and the added benefit of Clearfield technology, helping control weeds effectively. Each of these varieties has unique traits that cater to different farming needs and conditions.

Comparison of Seed Traits and Performance Metrics

When comparing barley seed varieties, consider traits such as disease resistance, maturity rate, and grain quality. Compass offers robust disease resistance, particularly against leaf rust and powdery mildew. La Trobe excels in grain size and plumpness, ideal for malting purposes. 

Spartacus CL includes herbicide tolerance, making it easier to manage weeds. Evaluate these metrics based on your farm’s specific requirements to choose the variety that offers the best performance under your conditions.

How to Match the Best Variety to Your Farm’s Needs

To select the optimal variety, assess your farm’s environment and objectives. If you face frequent challenges with pests and diseases, a variety like Compass with strong resistance traits might be beneficial. For those aiming to supply the brewing industry, La Trobe’s malting quality can be a significant advantage. Weigh the traits and performance metrics against your farm’s soil, climate, and market goals to make an informed choice that maximises your yield and profitability.

Tips for Optimal Seed Planting and Care

1. Best Practices for Seed Planting and Spacing

Proper seed planting and spacing are vital for healthy barley growth. Plant seeds at the recommended depth, usually around 3-5 cm, to ensure adequate soil contact and moisture absorption. 

Spacing is critical; aim for about 25 cm between rows to allow enough room for each plant to thrive without competing for resources. Proper spacing reduces the risk of disease spread and ensures even growth across your field.

2. Recommended Fertilisation and Irrigation Schedules

Barley plants require balanced nutrition to reach their yield potential. A soil test can help determine the specific nutrients needed. Typically, applying nitrogen at the beginning of the growing season and again during the tillering stage promotes vigorous growth. 

Phosphorus and potassium are also essential and should be applied before planting. Regular irrigation is crucial, especially during the grain-filling stage, but overwatering should be avoided as this can lead to root diseases.

3. Monitoring and Maintenance for Healthy Barley Growth

Once planted, regular monitoring and maintenance are key to ensuring a healthy crop. Keep an eye out for signs of pests and diseases, and address issues promptly. Use integrated pest management strategies to minimise chemical use and protect the environment.

Regularly check soil moisture levels and adjust irrigation as needed to maintain optimal conditions. Timely interventions and careful management can significantly affect your barley yield.

Elevate Your Barley Crop with Expert Seed Selection

Boosting your barley yield starts with choosing the right seed variety. Understanding the different types of barley seeds and their specific benefits can significantly impact your crop’s success. Considering factors like climate adaptability, disease resistance, and yield potential helps you select a variety that suits your farm’s unique needs.

Implementing best practices in seed planting and care further enhances the growth and health of your barley crop. From correct planting depth and spacing to proper fertilisation and irrigation schedules, each step plays a crucial role in achieving high yields. Regular monitoring and maintenance ensure that your crop stays healthy throughout its growth cycle.

If you’re looking to maximise your barley yield and quality, consider consulting with the experts at Shepherd Grain. We offer a wide range of top-performing barley seed varieties in Australia tailored to meet diverse growing conditions and market demands. Contact us today to learn more about our offerings and how we can help you achieve a successful barley harvest!

Choosing the right durum wheat seeds is a critical step for farmers aiming to achieve a successful harvest. Durum wheat, known for its high protein content and gluten strength, is essential for making pasta and other products. 

Selecting the best seed variety can directly impact your yield and the quality of your harvest. With many varieties available, it’s important to understand which traits will work best for your specific farming conditions.

Understanding Different Durum Wheat Varieties

1. Traits of Common Varieties

Durum wheat comes in various varieties, each with unique traits. Some common varieties include Kronos, Svevo, and Desert King. Kronos is known for its high yield and strong gluten strength, making it ideal for pasta production. Svevo offers good disease resistance and excellent milling qualities. 

Desert King has a shorter growing period and performs well in hotter climates. Knowing the traits of these varieties helps you select seeds that match your needs and farming conditions. This selection process ensures you get the best possible yield and quality.

2. Selecting the Right Variety for Your Farm

Choosing the right variety for your farm involves considering several factors. Look at your soil type, climate, and the primary use of your durum wheat. If you plan to produce pasta, opt for varieties with high protein content and gluten strength. 

For farms in hotter areas, choose heat-tolerant varieties. Additionally, consider the variety’s disease resistance; this reduces the need for chemical treatments and keeps the crop healthier. Matching the variety to your specific conditions maximises productivity and ensures a successful harvest.

3. Benefits of Modern Seed Varieties

Modern seed varieties offer numerous benefits over traditional ones. These varieties are developed through extensive research to provide higher yields, better disease resistance, and improved grain quality. They mature faster, allowing for flexible planting and harvesting schedules. 

Advanced breeding techniques result in seeds that can withstand various environmental stresses, such as drought or extreme temperatures. Using modern seed varieties enhances your farm’s productivity and the overall quality of your durum wheat crop.

Soil and Climate Requirements for Durum Wheat

1. Ideal Soil Conditions

Durum wheat thrives in well-drained, loamy soils. The ideal soil should have good fertility and a pH level between 6.0 and 7.5. Ensuring the soil is rich in essential nutrients like nitrogen, phosphorus, and potassium supports strong plant growth. 

Adding organic matter or compost can improve soil structure and fertility. Performing a soil test before planting helps determine the nutrient levels and pH, allowing for necessary adjustments. Proper soil conditions provide a strong foundation for a healthy and productive durum wheat crop.

2. Climate Considerations for Durum Wheat

Durum wheat prefers a warm, dry climate. It grows best in regions with mild winters and hot, dry summers. Too much rainfall can cause diseases and reduce grain quality. Therefore, regions with low humidity are ideal. 

Understanding your farm’s climate helps you plan the planting season to avoid adverse weather conditions. Monitoring weather patterns and adjusting planting dates accordingly ensures that your durum wheat grows in optimal conditions, resulting in a higher yield.

3. Preparing Your Fields for Planting

Proper field preparation is crucial for successful durum wheat cultivation. Start by clearing the fields of debris and weeds. Tilling the soil to a depth of about 15-20 cm breaks up compaction and creates a good seedbed. 

Incorporate any necessary fertilisers or soil amendments based on your soil test results. Level the field to ensure even distribution of seeds during planting. Preparing your fields thoroughly sets the stage for healthy germination and strengthens the growth of your durum wheat plants.

Effective Planting and Growing Techniques

1. Best Planting Practices

Getting the planting process right is vital for the success of your durum wheat crop. Planting should ideally occur in early spring or late winter when the soil temperature is moderately warm. Ensure the seeds are planted at a uniform depth of about 2-4 cm to promote even germination. 

Seed spacing is also crucial; aim for a density of around 200-300 seeds per square metre. This density ensures that the plants have enough space to grow but are close enough to maximise yield. Proper planting sets the stage for healthy growth and development.

2. Irrigation and Water Management

Irrigation plays a key role in the growth of durum wheat. While durum wheat is somewhat drought-tolerant, it requires consistent moisture during critical growth phases such as tillering and grain-filling. Using drip or sprinkler irrigation systems can help maintain the right moisture levels. 

Avoid over-watering as it can lead to root diseases and other issues. Monitor soil moisture regularly and adjust your watering schedule based on rainfall and soil conditions. Effective water management supports robust plant development and enhances yield.

3. Fertilisation and Nutrient Needs

Durum wheat needs a balanced supply of nutrients for optimal growth. Nitrogen is essential early in the growth stage to promote leaf development. Phosphorus supports root development and should be applied during planting. Potassium helps with overall plant health and grain production. 

Based on soil test results, apply fertilisers in moderate, regular doses to ensure consistent nutrient availability. You can use both organic and inorganic fertilisers depending on what your soil needs. Proper fertilisation promotes healthy plants and maximises yield.

Harvesting and Storing Durum Wheat

1. Timing the Harvest

Harvesting at the right time is critical for maximising yield and maintaining grain quality. Typically, the best time to harvest durum wheat is when the grains are hard, and the moisture content is around 12-14%. 

Harvesting too early can lead to immature grains, while harvesting too late can cause grain shattering and loss. Regularly check the moisture levels of the grains as the harvest time approaches. Using modern harvesting equipment can make the process efficient and reduce losses. Right timing ensures the best quality and quantity of your crop.

2. Techniques to Maximise Yield

To maximise yield, use efficient harvesting techniques. Adjust your combined harvester settings to match the condition of your fields. Ensure the cutting height is optimal to capture as much of the grain as possible while avoiding unnecessary straw intake. 

Harvesting during cool, dry conditions can also minimise grain loss. Regular maintenance of your harvesting equipment ensures smooth operation and reduces the risk of breakdowns. By following these techniques, you can maximise your yield and ensure the best return on your efforts.

3. Proper Storage to Maintain Quality

Proper storage is essential to maintain the quality of your durum wheat after harvest. Store the grains in clean, dry, and well-ventilated silos or bins to prevent mould and pests. Ensure the storage area is free from previous crop residues that could contaminate the new harvest. 

Regularly inspect the storage facilities for any signs of moisture or pest infestation. Using airtight containers and monitoring temperature and humidity levels helps keep the grains dry and safe. Proper storage methods ensure that your harvested grains remain in top condition until they are ready for sale or use.

Maximise Your Yield: Choose the Right Durum Wheat Seeds

Choosing the right durum wheat seeds and following proper cultivation practices are key to achieving a successful harvest. By understanding different seed varieties and matching them to your soil and climate conditions, you lay the foundation for a productive crop. Effective planting, water management, and fertilisation further support healthy growth, while timely harvesting and proper storage maintain the quality of your grains.

We at Shepherd Grain provide the latest seed varieties and expert advice to help you succeed. We can support your farming needs with our state-of-the-art seed treatment and a wide range of high-germination seeds. Explore how we can assist you in achieving a top-quality durum wheat harvest in Australia!